
FAQ 番号:
16998
モバイルWiFiルーターのAPN設定方法(HT100LN)
よくあるご質問(FAQ)
型番:HT100LN
※こちらはe-TAMAYAでレンタルされたモバイルWi-Fiをリセットしてしまった方向けのAPN設定方法です。
ノートパソコンとモバイルWiFiルーターを接続する
❶ パソコンとモバイルWi-Fiルーターを付属のLANケーブルで接続します。

「aterm.me」にログインする
❶ ブラウザを開き、アドレスバーに「aterm.me」と入力し、Enterを押す。

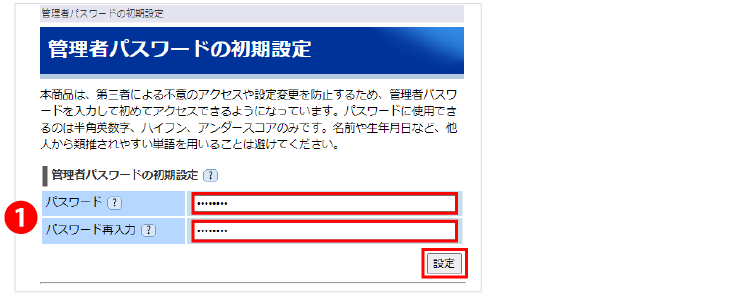
管理者パスワードの初期設定
❶ パスワードに「e-tamaya」を入力して〔設定〕をクリックする。
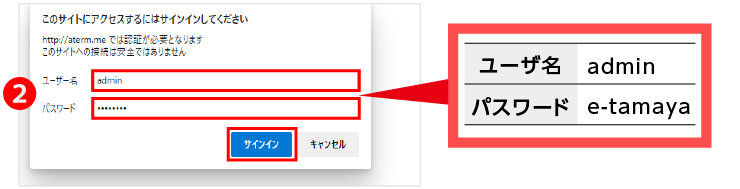
❷ 下記ユーザー名に「admin」、パスワードに「e-tamaya」を入力してサインインを押す。
設定ウィザードの開始確認
❶〔はい〕をクリックする。

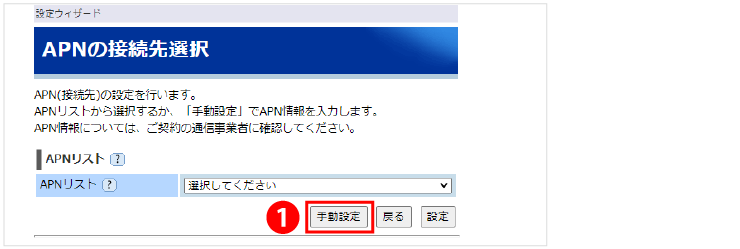
APNの接続先選択
❶ APNリストは何も選択せず、〔手動設定〕をクリックする。
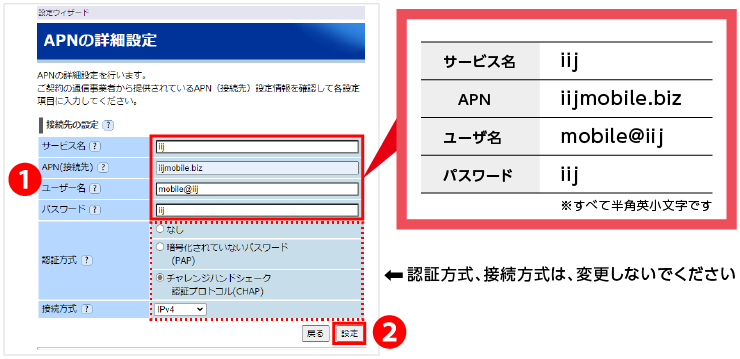
APNの接続先設定
❶ 各項目に、それぞれ入力する。
❷ 〔確認〕をクリックする。
テキストデータが必要な場合は下からからどうぞ
■ サービス名 : iij
■ APN : iijmobile.biz
■ ユーザ名 : mobile@iij
■ パスワード : iij
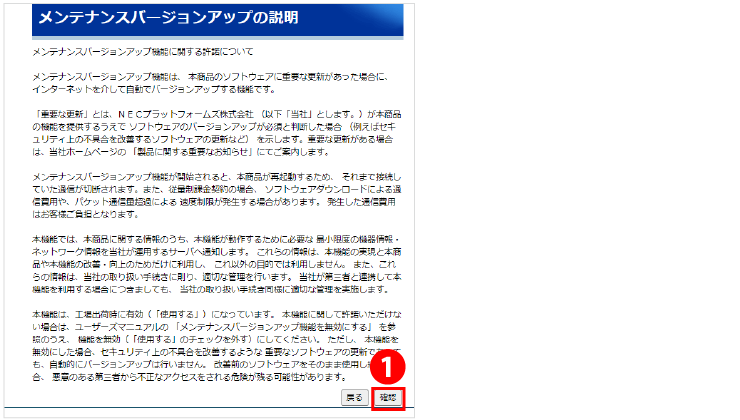
メンテナンスバージョンアップの説明
❶ 〔確認〕をクリックして、次へ進む。
WAN側接続確認
画面の案内に従って進めてください。
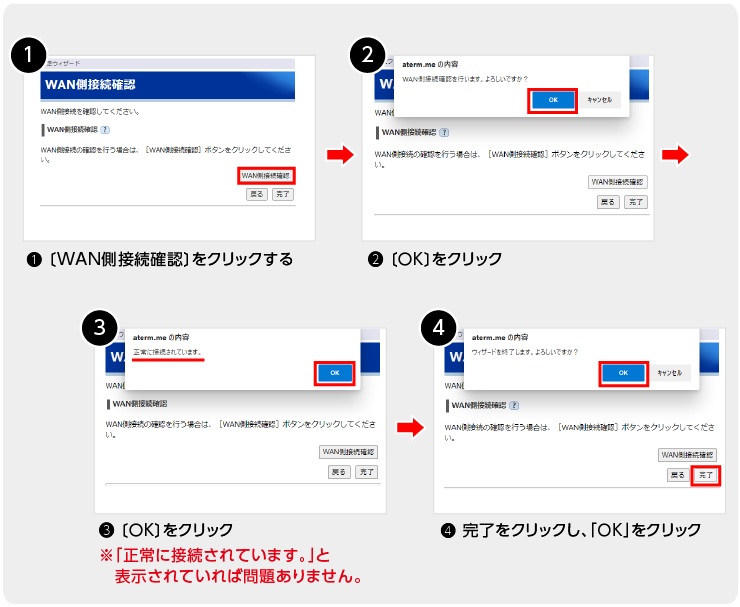
❺ aterm.meのトップ画面が表示され、完了。
ノートパソコンとモバイルWiFiルーターを無線で接続する
❶ 付属の有線LANケーブルをはずす。
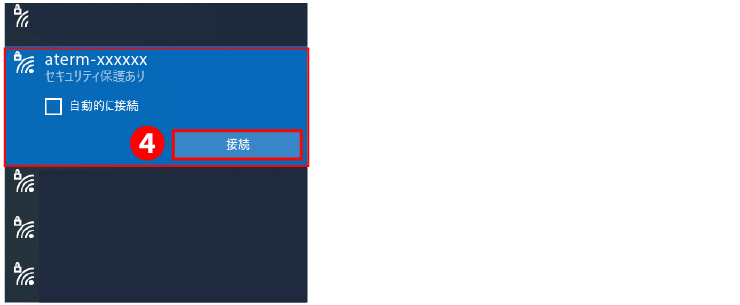
❷ 画面の右下の地球アイコンをクリックし、「ネットワーク設定」を選択します。

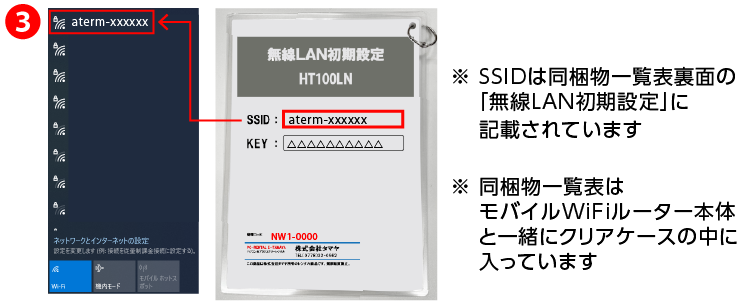
❸ ネットワークの一覧が表示されますので、接続したいSSIDを選択します。
❹ 接続をクリックします。
※次回より自動的にWi-Fiに接続したい場合は「自動的に接続」にチェックをいれてください
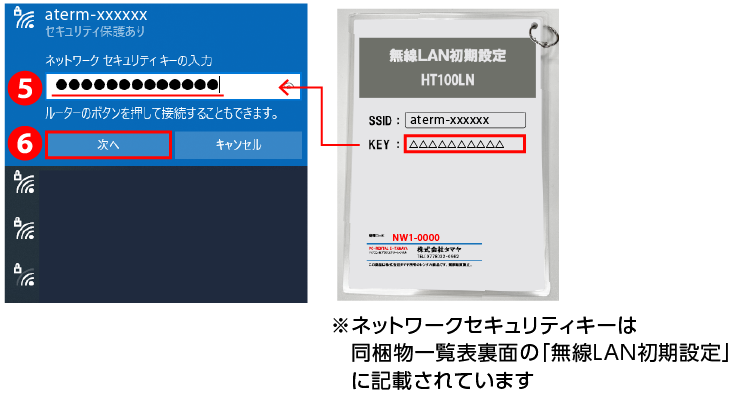
❺ ネットワークセキュリティキーを入力します。
❻ 次へをクリックします。
❼ 「接続済み、セキュリティ保護あり」と表示されていれば完了です。

※インターネットに接続できることをご確認ください。
※反映にはしばらく時間がかかります。