公開日 2023.10.27
最終更新日 2023.10.27


iPadのバックアップを取りたいんだけど、どうやってやるの?
今回はiCloudでバックアップをする場合を教えるね

タマちゃんありがとう!復元する方法も合わせて教えて!
iPad・iPhone のデータをiCloud にバックアップする方法
検証機器:iPad(8 世代)iPad OS16.6
前提条件:Apple IDがログイン状態になっている事。WiFi環境下であること。
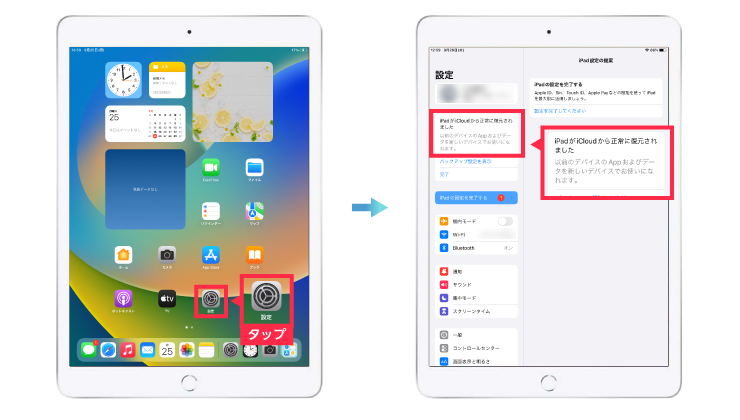
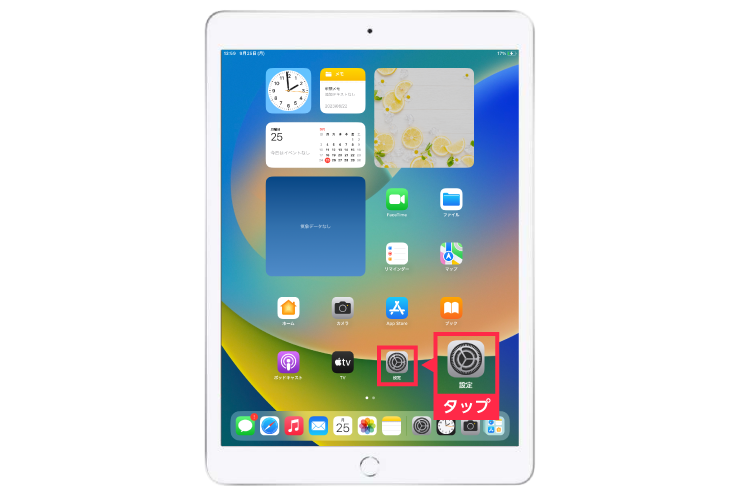
❶「設定」をタップしてください。
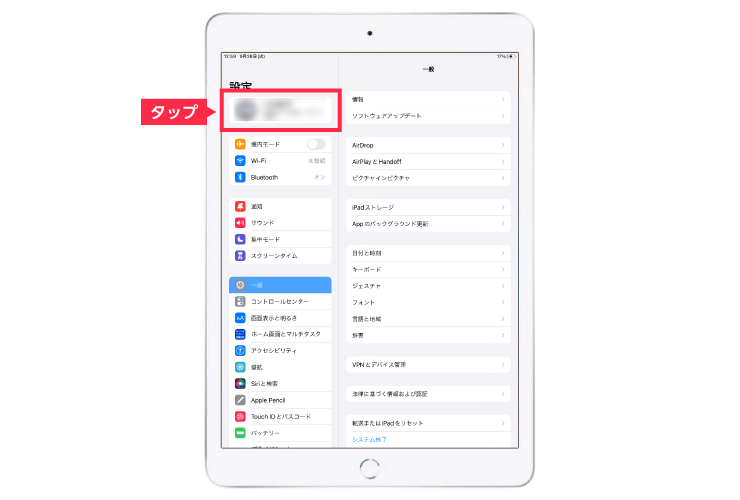
❷Apple ID にログインした状態で「Apple ID」をタップしてください。
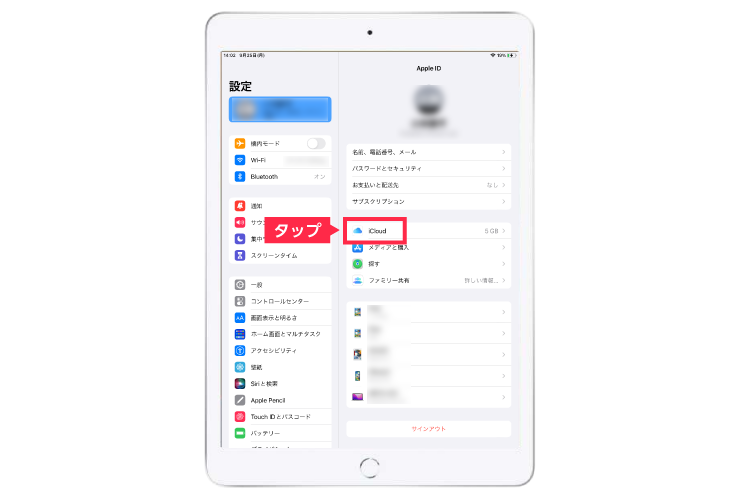
❷「iCloud」をタップしてください。
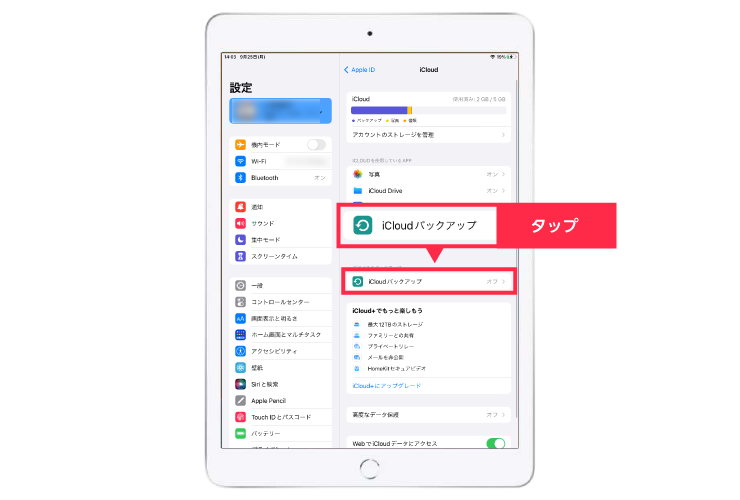
❸「iCloudバックアップ」をタップしてください。
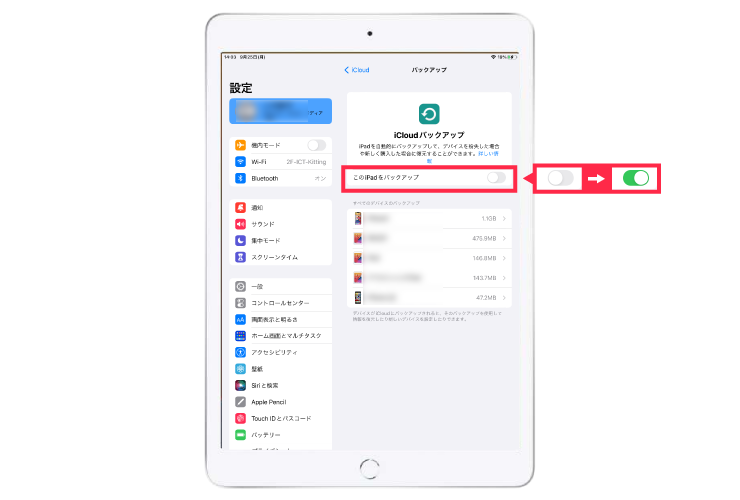
❹「このiPadをバックアップ」のトグルをオンにしてください。
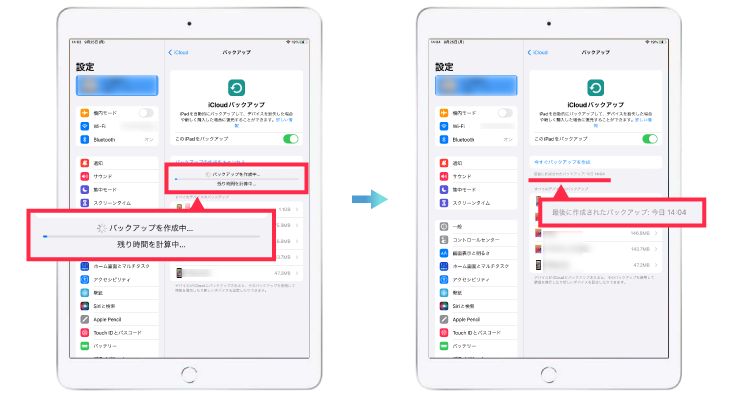
❺「バックアップを作成中…」の表示が「最後に作成されたバックアップ:今日〇〇:〇〇」と表示されたら、バックアップは終了です。
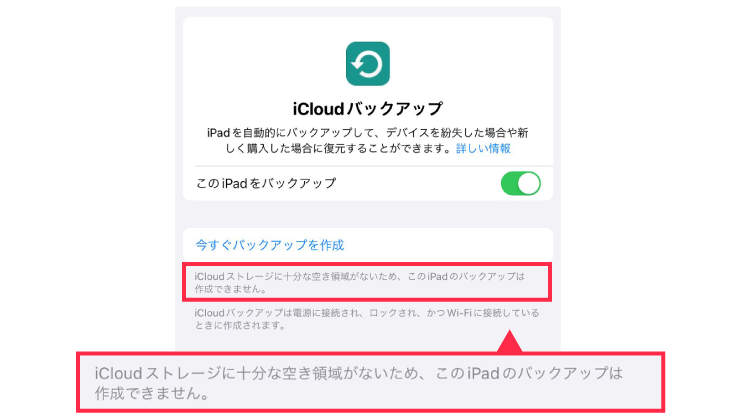
「iCloud ストレージに十分な空き領域がないため~」と出た場合
※iCloudの無料版の空き容量は5GBです。
下の写真のような表示が出た場合はiCloudのストレージに空き容量が不足している為、バックアップが実施できません。プランをアップグレードする(有料)か、iCloudを使用せずにPC/Macへのバックアップを推奨いたします。
iPad・iPhoneのデータをiCloudから復元する方法
ご使用のiPhoneやiPadが不具合で初期化したり、デバイスの引継ぎができなかった時など、iCloudに取っておいたバックアップを使って復元する事ができます。
検証機器:iPad(8 世代)初期化した状態 iPad OS16.6
必須条件:WiFi環境下である事。
❶iCloudに取ったバックアップをデバイスに復元します。
以下の通りに設定していただき、「APPとデータ」まで進めて下さい。
国または地域の選択(適宜設定してください。)→
クイックスタート(手動で設定)→
文字入力および音声入力の言語(続ける)→
WiFiネットワークを選択(お使いのWiFiを適宜入力してください。)→
データとプライバシ―(続ける)→
Touch ID(適宜設定してください。)→
パスコードを作成(適宜設定してください。)→
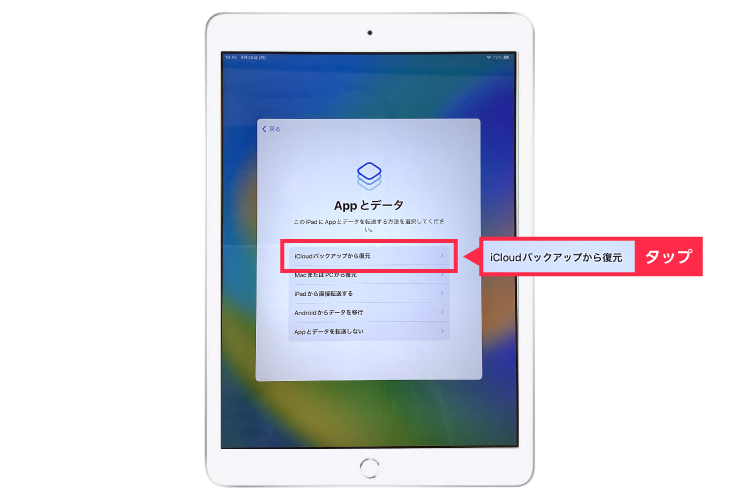
❷「APP とデータ」で「iCloud バックアップから復元」をタップしてください。
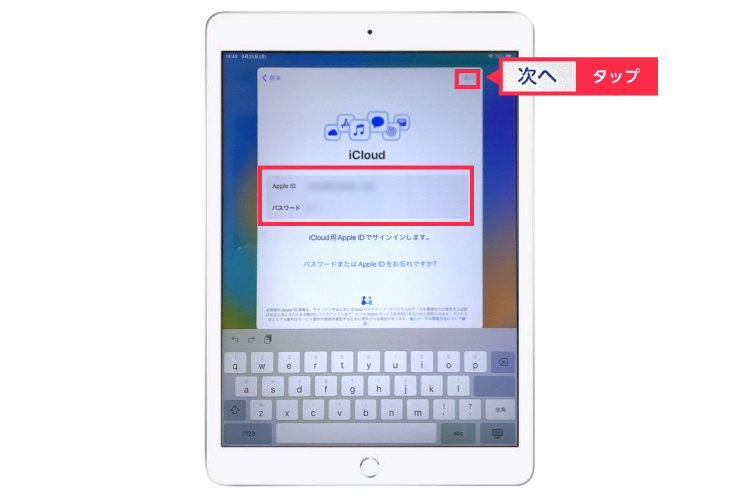
❸「次へ」をクリックしてください。
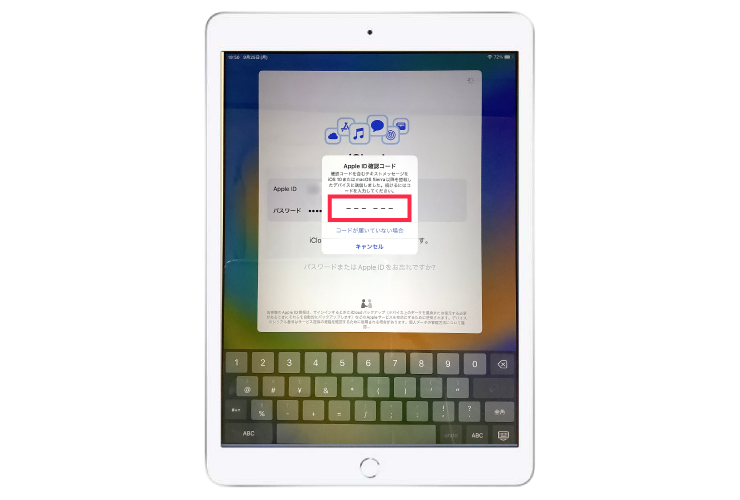
❹同じIDのAppleデバイスまたは登録の電話番号に「Apple ID確認コード」が送られますので、6桁の番号を入力して下さい。
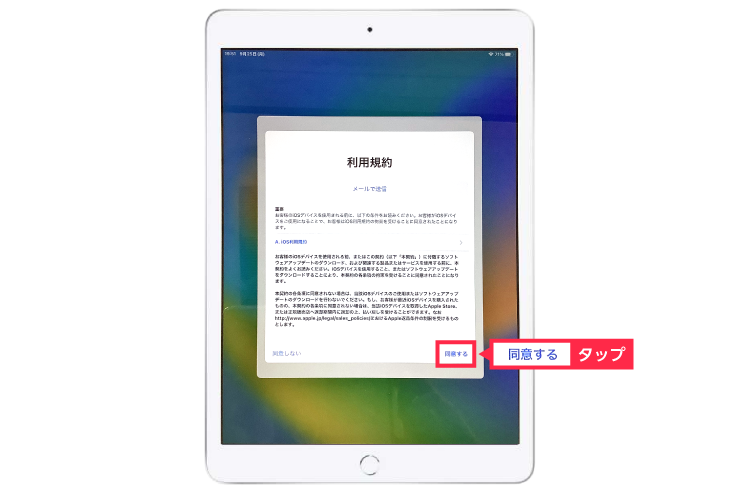
❺「利用規約」をご一読いただき、「同意する」をタップしてください。
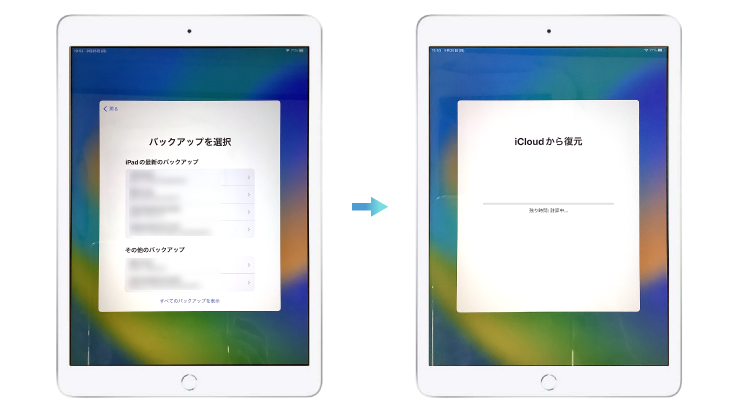
❻「バックアップを選択」復元したいバックアップを適宜選んでください。複数のデバイスでiCloudにバックアップをされている場合は間違えないように気をつけてください。
❼復元が終わったら「設定」をタップして「iPadがiCloudから正常に復元されました。」と表示されていたら完了です。